
How To Take Better Product Photos For Your Website
Every successful business thrives on its social media and overall online presence. While social media is the first contact for most customers and potential clients, increasing the sales of your products is the main goal. In between the first contact and the product sales is usually the website.
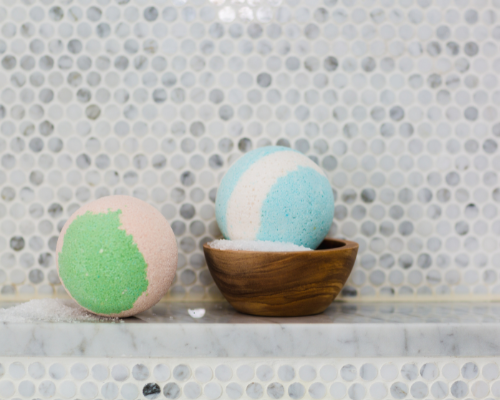
When you are selling a product on your website, you need engaging product photos. This article will give you more details about product photos, tools, ideas, and the benefits of getting the perfect product photos to make your ecommerce business a successful one.

What are Product Photos?
Have you searched for a product before, either in a physical store or an online shop? I am guessing that you have. When buyers start examining a product, especially in an online shop, they often ignore the product description and zoom in on the picture. Even in a brick-and-mortar shop, customers are first attracted to the most compelling pictures, designs, and products in the room even when they are not buying them.
For most of us the first things protentional buyers are going to want to see is what the product looks like. It tells shoppers about the product’s size, color, and shape. At first glance of a product picture, is should also easily tell your customers what your product can do.

What Makes a Perfect Product Picture?
Some sellers do not have a good product photo on their website because they do not know what it looks like or what they should even be looking for. This section has identified some details that would entice your buyers when they see your product picture. Plus help you learn what to think about to take better photos for your products!
– Proper Lighting: Lighting is the difference between a color and its dark tint. When the lighting is terrible, potential buyers cannot see the real color and are not impressed. You can give your product picture the right lighting by using artificial sources and natural light.
– Rule of Thirds: This rule is often used to define the composition of a picture. It states that the subject of your picture, which is your product, should be on the right or left a third of the image. Hence, the other two-thirds will be open.
– Context, Details, and Varieties: Your product is probably the first of its kind, but does it offer the same features as the rest? The context shows how they can use it, while the details comprise the unique features. In addition, the varieties of a picture show the ranges that can appeal to different tastes. An example of this might be different colors of the same shirt!
– Background: Background is where the context, details, and varieties are captured. However, the background has even more importance to a product picture. Background cannot afford to be chaotic or messy because it helps to emphasize the product.
– Editing: If you already have a product picture and lack any of the four other factors for a perfect product picture mentioned above, you can edit it. Editing is how you perfect your picture by changing the background, increasing the lighting or brightness, and many other tricks.
Tools for Taking an Improved Product Photo
There are different types of product photography. The two most important ones are individual shots or clear-cut and lifestyle or in-context photos. The former means only the picture sits on a single color (often white, but can be other light colors) background. The latter is photographed with a model or other complementary tools called props. Depending on which of these styles of product photography you want to employ, you need tools. I would recommend doing both types of styles. Some of the tools that you can use are tripods to keep your camera still, props to give your product context, camera (your phone should work fine if you can’t get an expensive one), ring light, clean table, Canva, etc.
How to Use Your Tools for Taking Better Product Photos
Knowing what you want to achieve when taking a picture and having the tools are very important. What is even more important is knowing how to use the tool to take a photo that will make your product website more impressive. In this section, I have identified some photography tips for you to maximize your tools.
– Choose the right camera: Cameras have exceeded the disposable wind-up types we take to summer camps. It would be best if you had a good camera because you are not only saving memories, you are creating interaction and answering questions that your customers may have. Luckily, you do not have to break the bank to have the right camera. Chances are you have one already. One of the most advanced features of smartphones is the cameras. Ensure that your camera is set to the highest quality image. If you are using a smart device and there is no memory space on the internal device, you can insert a memory card into it.
– Set up your product, background, and props: Before you start taking a picture, you want to set up the background of the picture. You need your product to be the focus of the picture you want to take. If the background is well set, you would not need to do too much editing. To further simplify your setting up your background, you can use a shooting table or color-specific backdrop. Or in a rush just a white background on clean crafting table! These options automatically remove clumsy background objects, especially for an individual shot. If your product photo is a lifestyle one, you can set up your background with the props. After you have positioned your shooting table and backdrop, lightly include your props without removing the emphasis from your product.
If you don’t have props or don’t want to use them you can use photos in Canva that are created to use as backgrounds for your products. You’ll remove the background from the image you took in Canva. Then search for the background type you would like and add it to the back of your product photo and you are done! This is a quick and easy way to get lifestyle photos without a lot of effort.
– Lighting and color consistency: Many websites have failed to impress customers because their products do not have consistent colors. Buyers can recognize inconsistent lighting caused by taking a picture indoors. When you are indoors, light reflections can only pass through the windows and door, which may reflect poorly on your product. You can also use the reflection to your advantage if the product is commonly used indoors. Aside from such instances, you need to control the light when taking a product photo.
Artificial lights are a good way to achieve color consistency. However, you can use natural light by taking pictures outdoor. But if you are indoors, natural lights are best near the window or door. Ring lights and product boxes are good idea to invest in. You can usually find them for less than $20 each and it makes a world of a difference.
– Do not be in haste: The chances are that you can still improve your creative product photography. You can only note the need for improvement when you take the time to examine each picture you have taken. I often suggest that sellers examine Etsy photographs and other e-commerce images to refresh themselves. After a while, thoroughly examine your pictures to see if you can make adjustments to the background or if there is a need for more lighting. Some pictures will require that you retake them from different angles. Some other pictures only need editing. Hence, you can use the light editing features of Canva and optimize the image. It would also be best to reduce the size while still maintaining the quality.

Benefits of Knowing How to Take a Great Product Photo on Your Website
I have found out that many sellers do not understand the importance of knowing how to take good photos of products. Therefore, I have listed a few benefits here for you.
– When people can see clearly what the product is and how to use it they are more likely to purchase causing business growth
– You can save a ton of money taking product photos yourself
– When you are ready t outsource your product photography or editing you have a better idea of what to as for.
– High-quality photos enhance shopper interaction with your website.
Conclusion of How To Take Better Product Photos For Your Website
Buyers are likely to click on and check out the features of the most attractive product picture on your website. To help you take better product photography for your website, this article sheds light on all the details about how to take a good product photo. These details include the characteristic you should watch out for, the tools you need, and how to take good photos of your products. When you follow these steps, your website’s conversion rate will grow, and your product will sell more.